Posts mit dem Label Tutorial werden angezeigt. Alle Posts anzeigen

Sonntag, 27. Juli 2014

How to enlarge sewing patterns using Inkscape

As you might have noticed by now, I kind of hate buying patterns, instead working with what I can find on the internet or my mothers pattern-making book. If you've read my post about the Stardress, you know how I usually enlarge patterns manually. But that's a lot of work, so recently I began to look at ways to enlarge patterns using my computer. What I found is Inkscape, an open source program to draw vector graphics. If you search for Inkscape on youtube etc, you'll find a lot of tutorials for all kinds of neat things, but I couldn't find a tutorial to enlarge sewing patterns, so here it is:
First things first, you don't need any fancy equipment for this, just the program and a mouse. I also suggest to watch one or two of the tutorials on youtube because you'll need to use the Bézier tool quite a lot and it's just easier to learn from a video. Ready? Here we go!
You'll need a pattern you want to enlarge first, of course. I used one of the quarter sized ones in the back of my mother's pattern making book and scanned it; for some reason, the scanner saved it at three times the size of the original, so I had to make some more calculations than normal, but as long as you know the ratio between your beginning and end point, you should be fine.
Open the image in Inkscape, I just click ok when it asks wether to embedd or do something else.
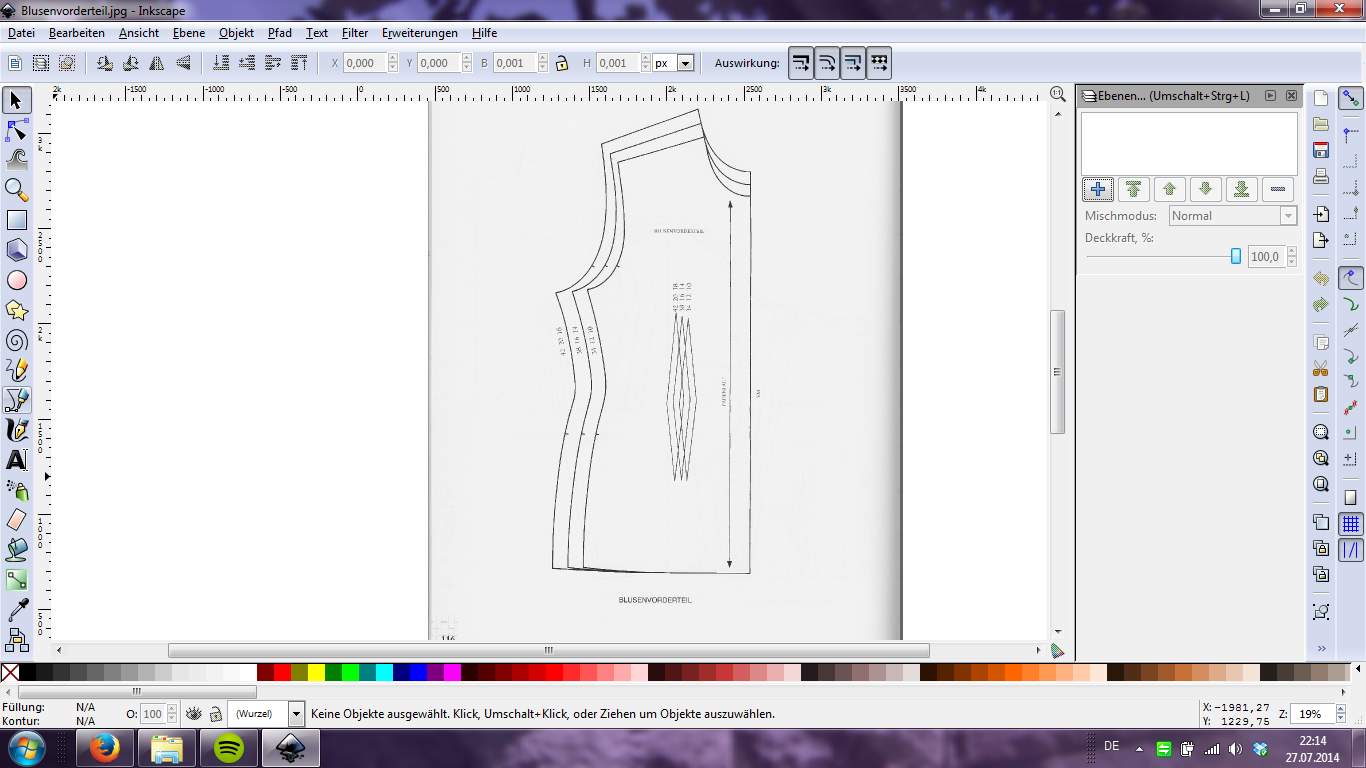
Please click on the image if it's too small ;)
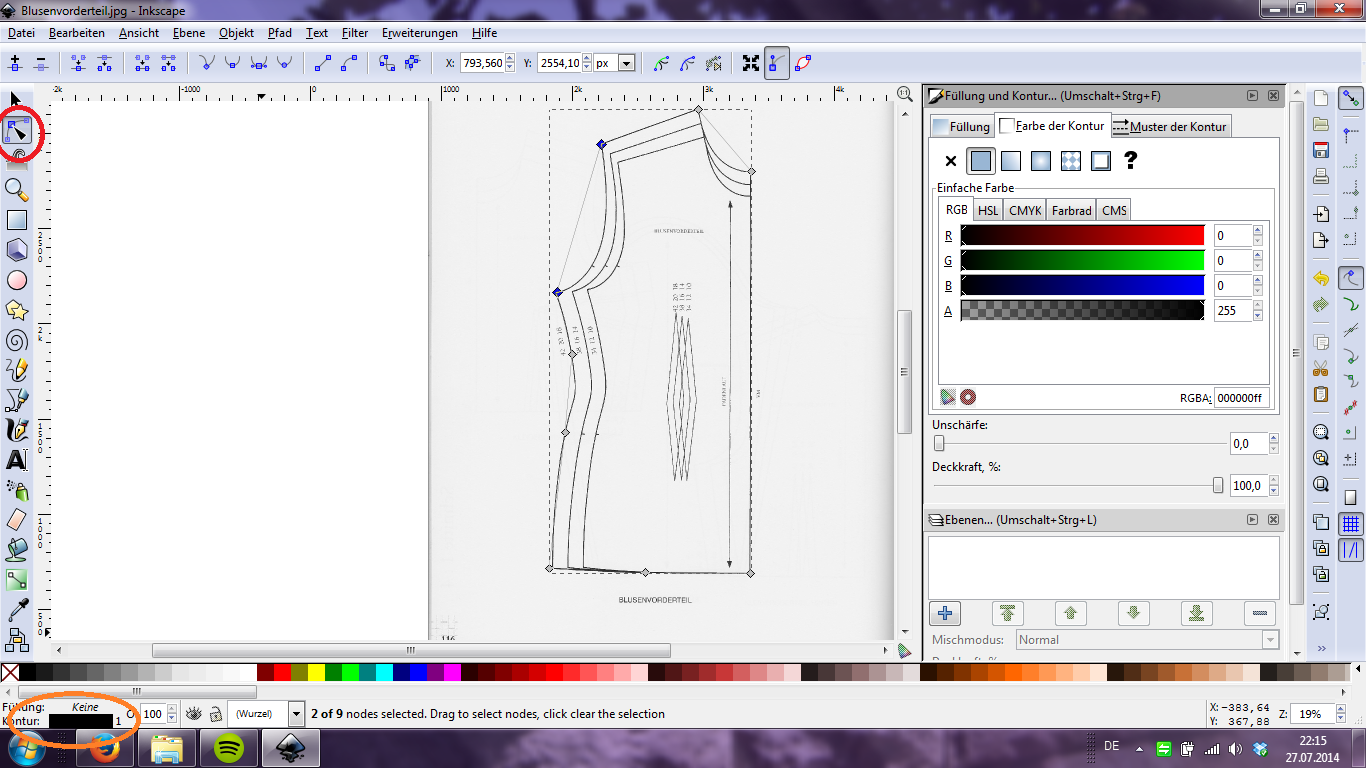
Then, using the Bézier tool, start tracing the pattern. I usually start with the biggest size and work my way to the smaller sizes, darts, grain lines etc. Make sure you trace everything you want to have on your big pattern!
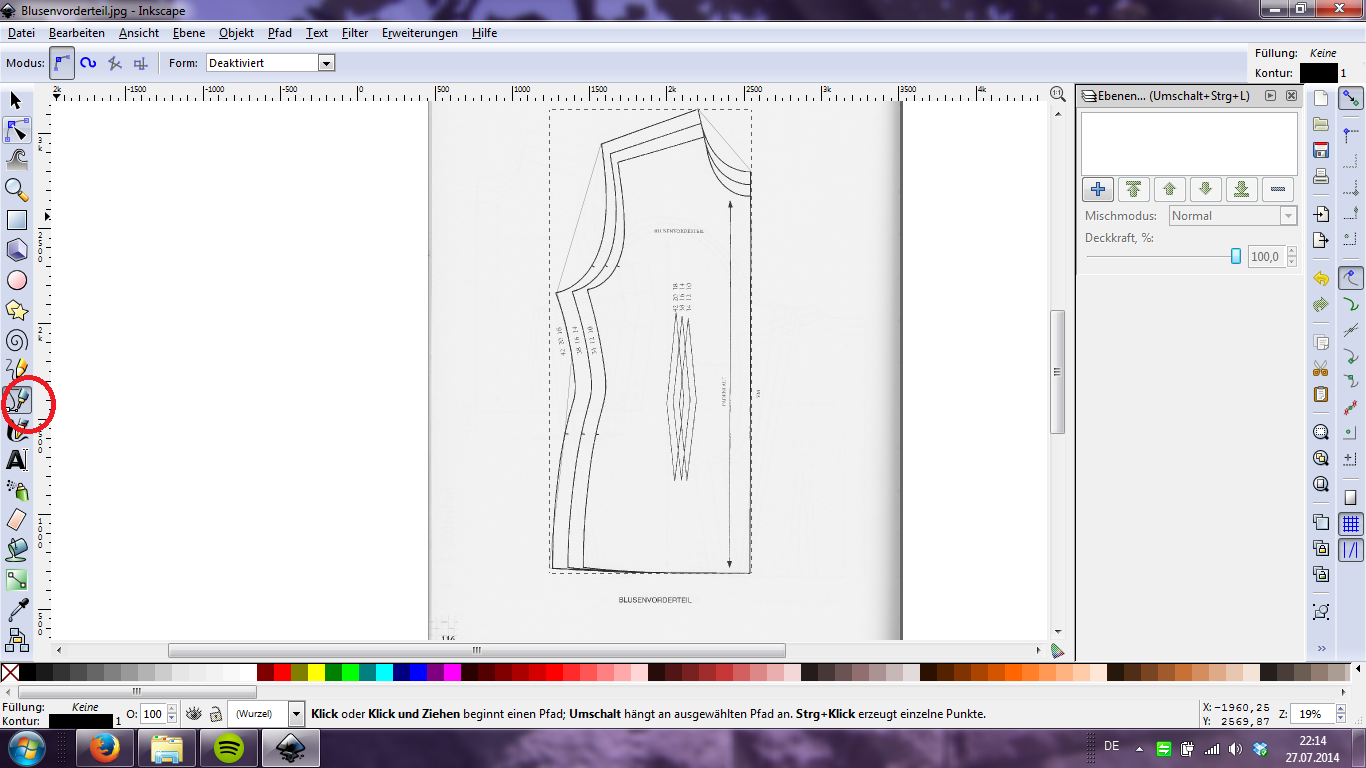
The Bézier tool, in case you didn't watch any tutorials

You'll need this tool to manipulate the straight lines into curves;
If you click here the window on the right side opens up

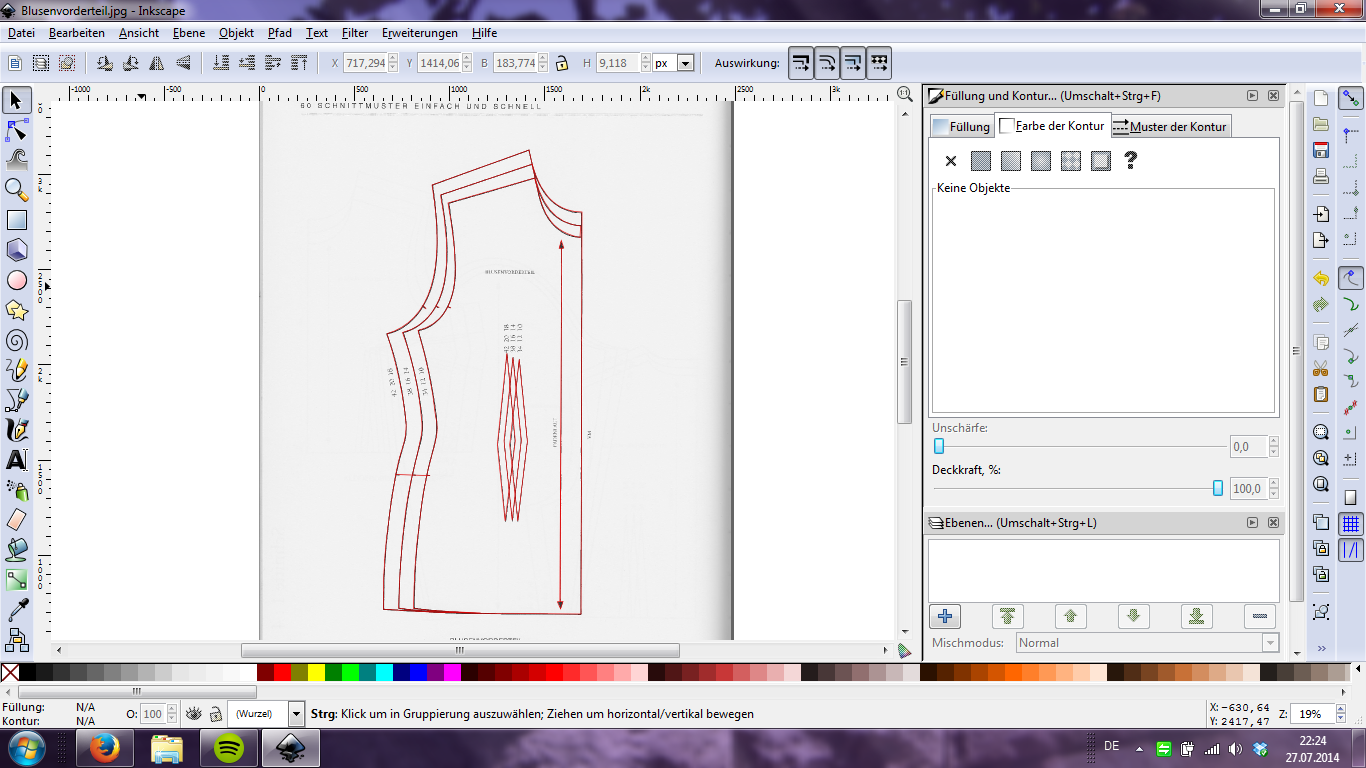
To make it easier on my eyes, I make all the lines red and 1mm thick using the window on the right side.
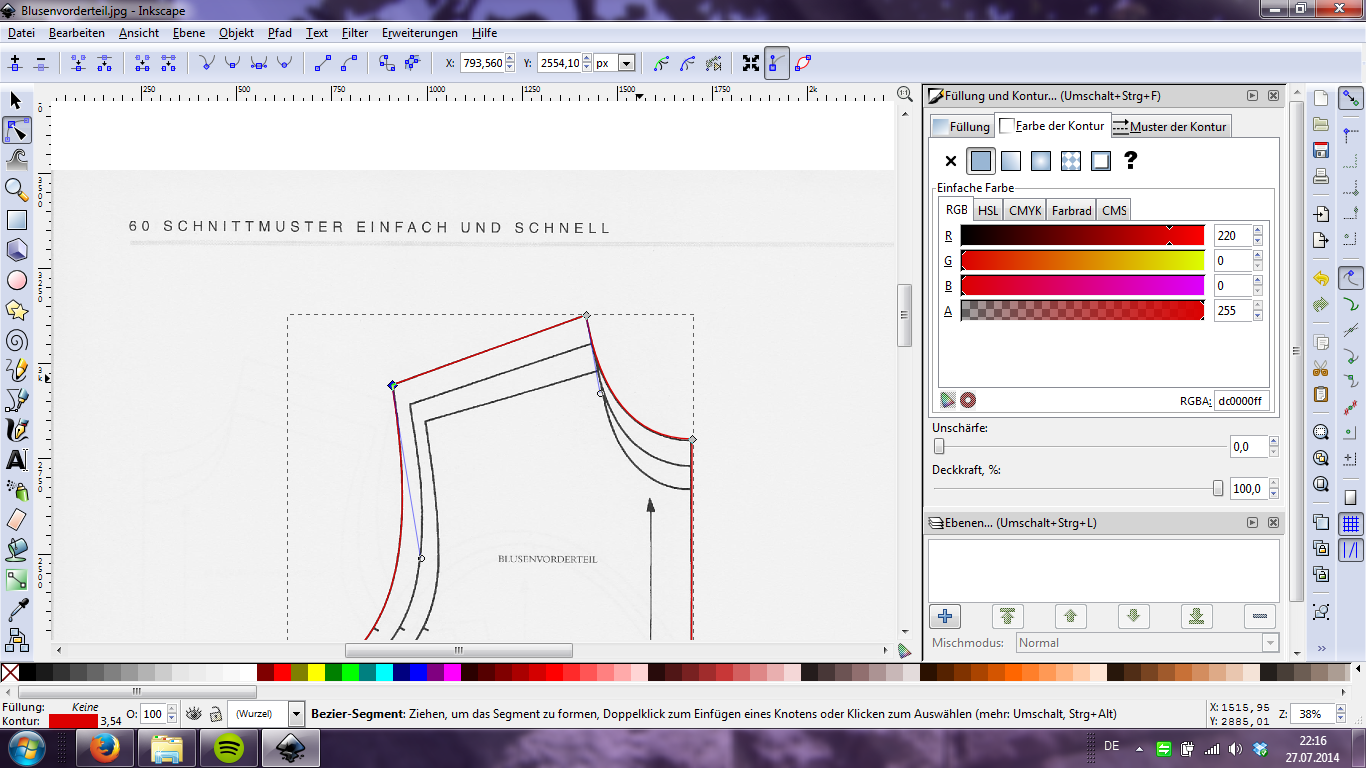
Work in progress...
...and all done
Now we manipulate our lines a little:
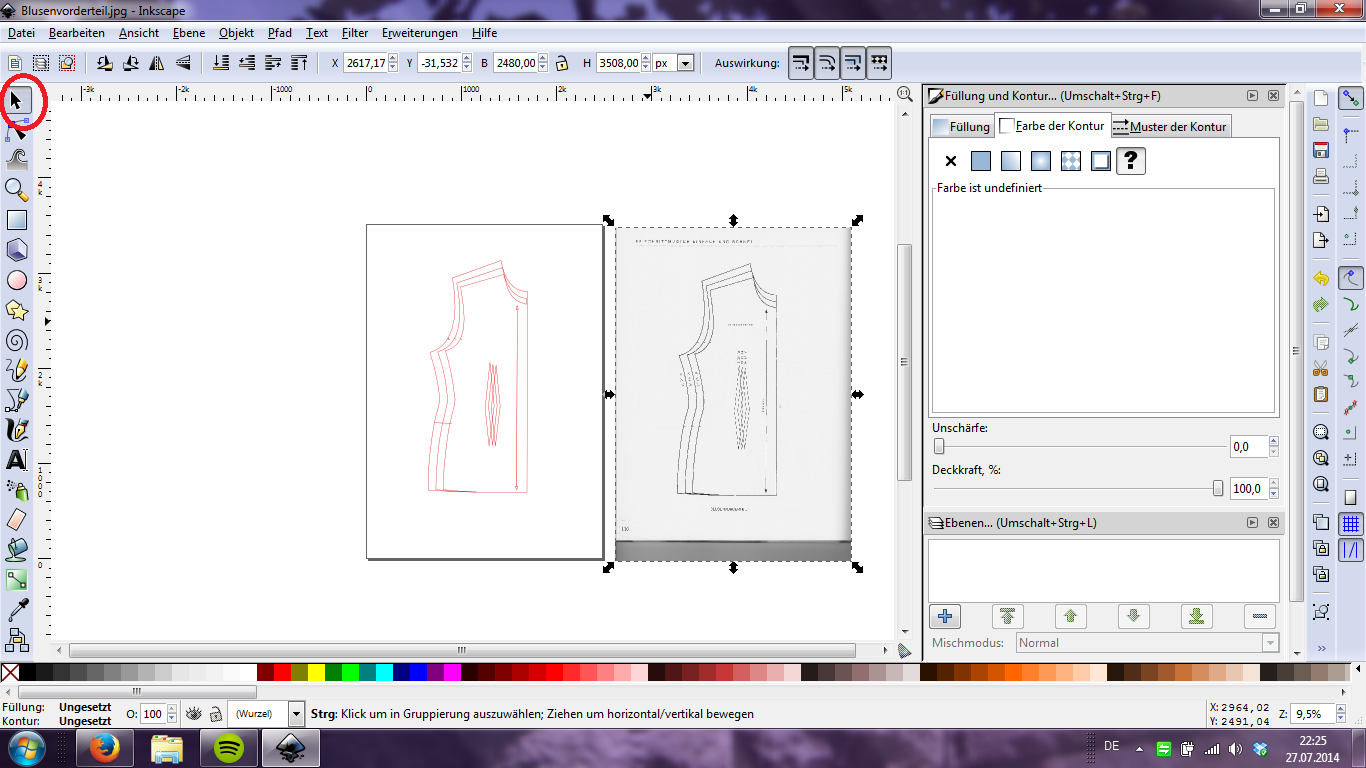
Using the selection tool, drag your background off the page.
We don't need that anymore! :)
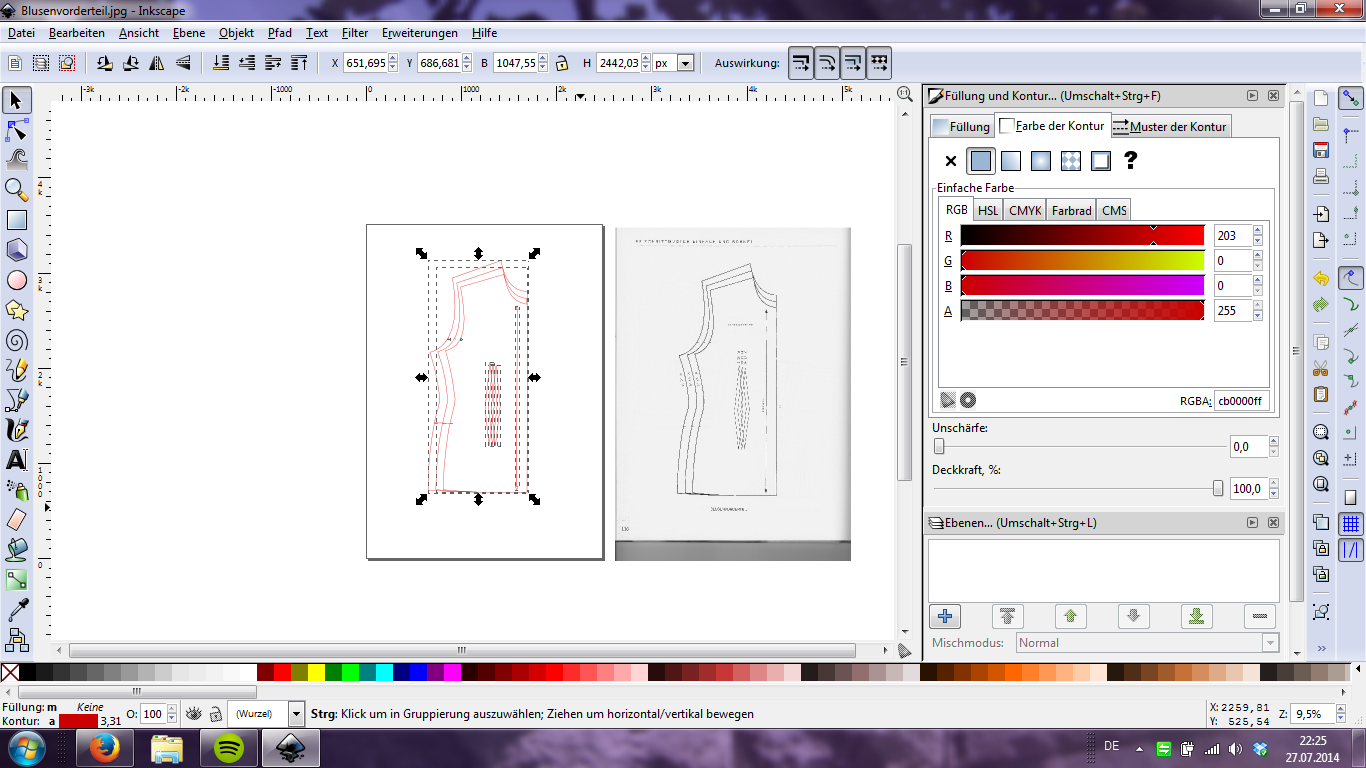
Select all your lines by drawing a big rectangle over all of them, still with the
selection tool
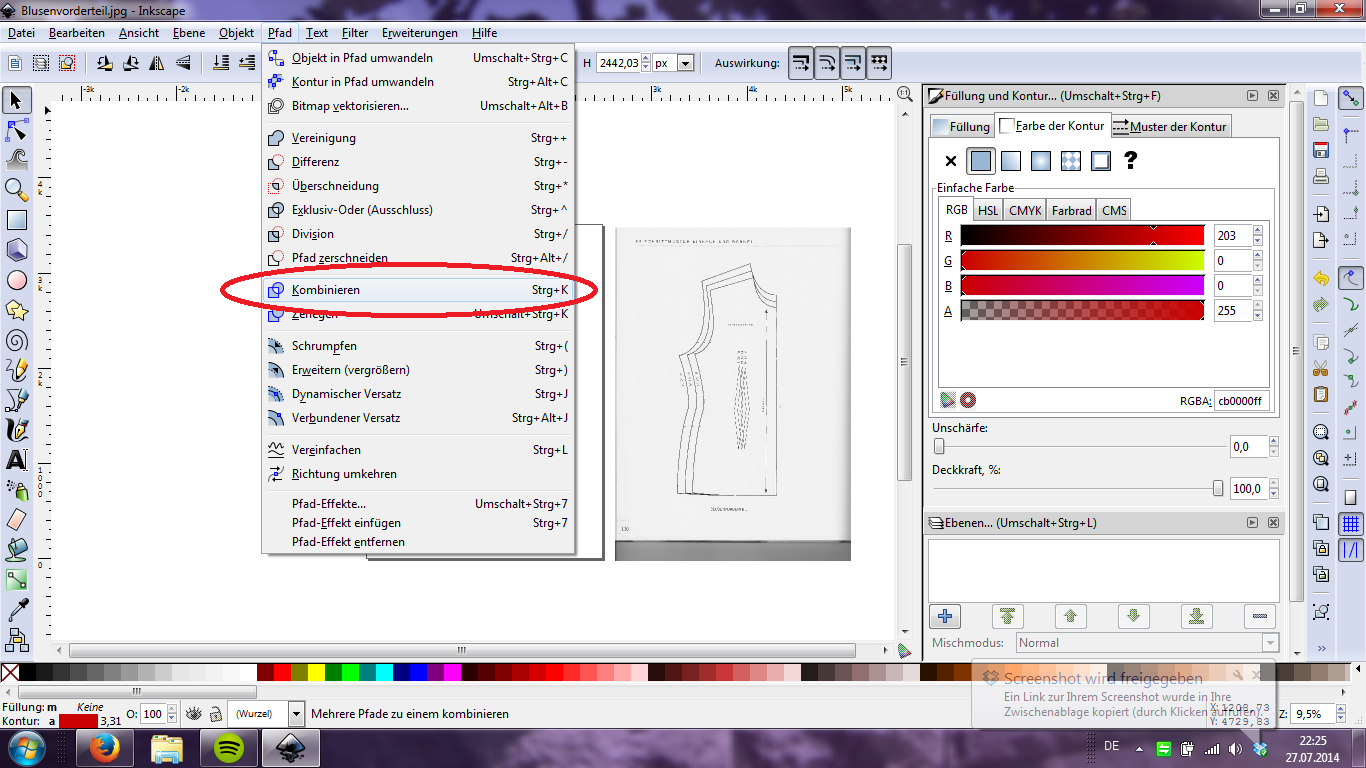
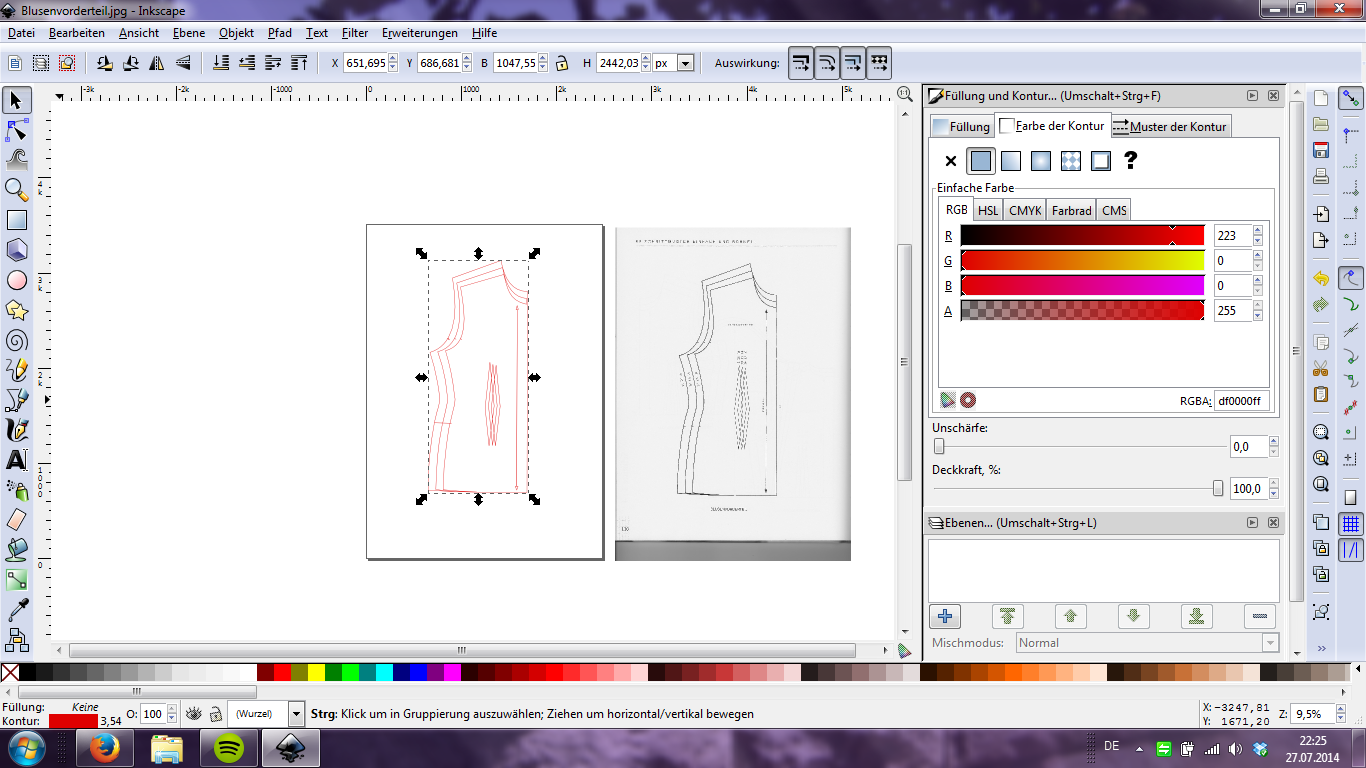
Now combine them, so you can move them all at the same time.
It should look something like this.
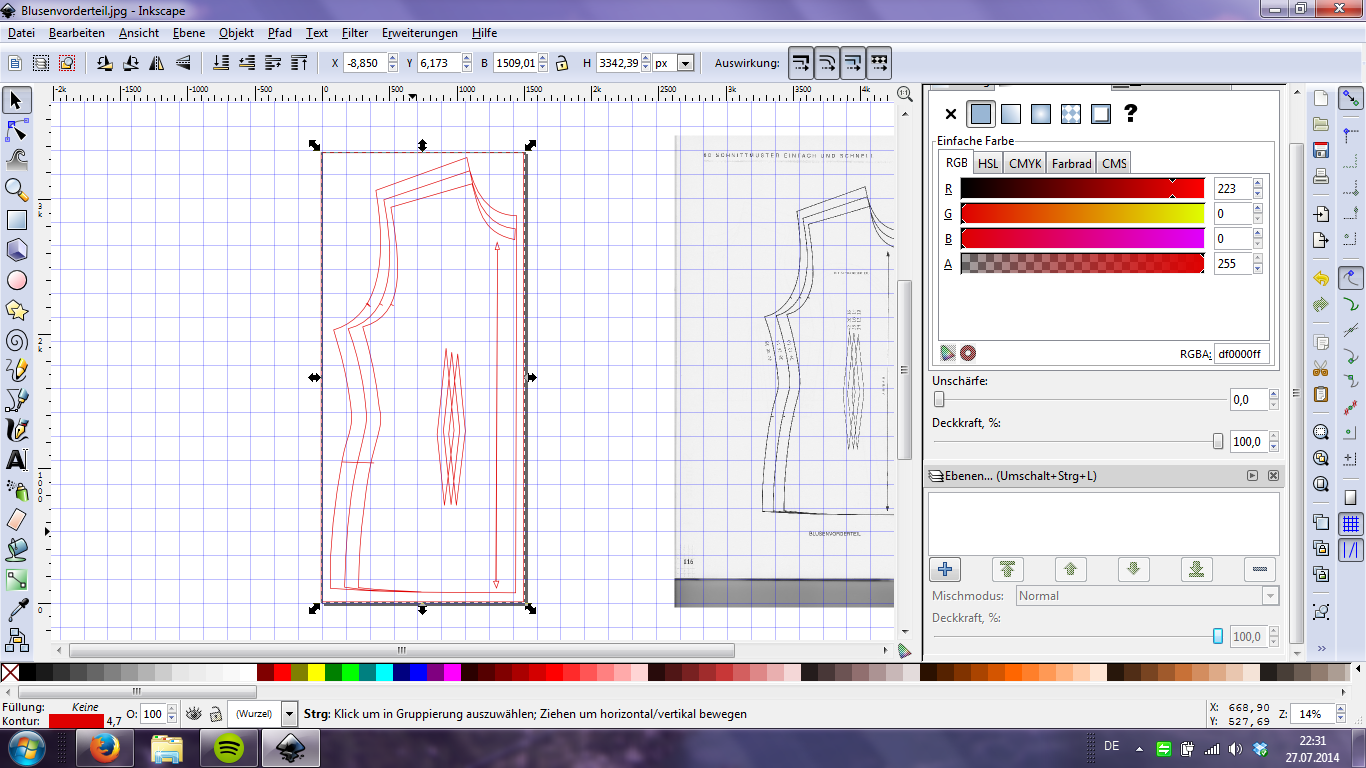
Now we need a grid:

I like mine to be a 1cm x 1cm grid, with thicker lines every 5cm for better visibility, but that's just personal preference.
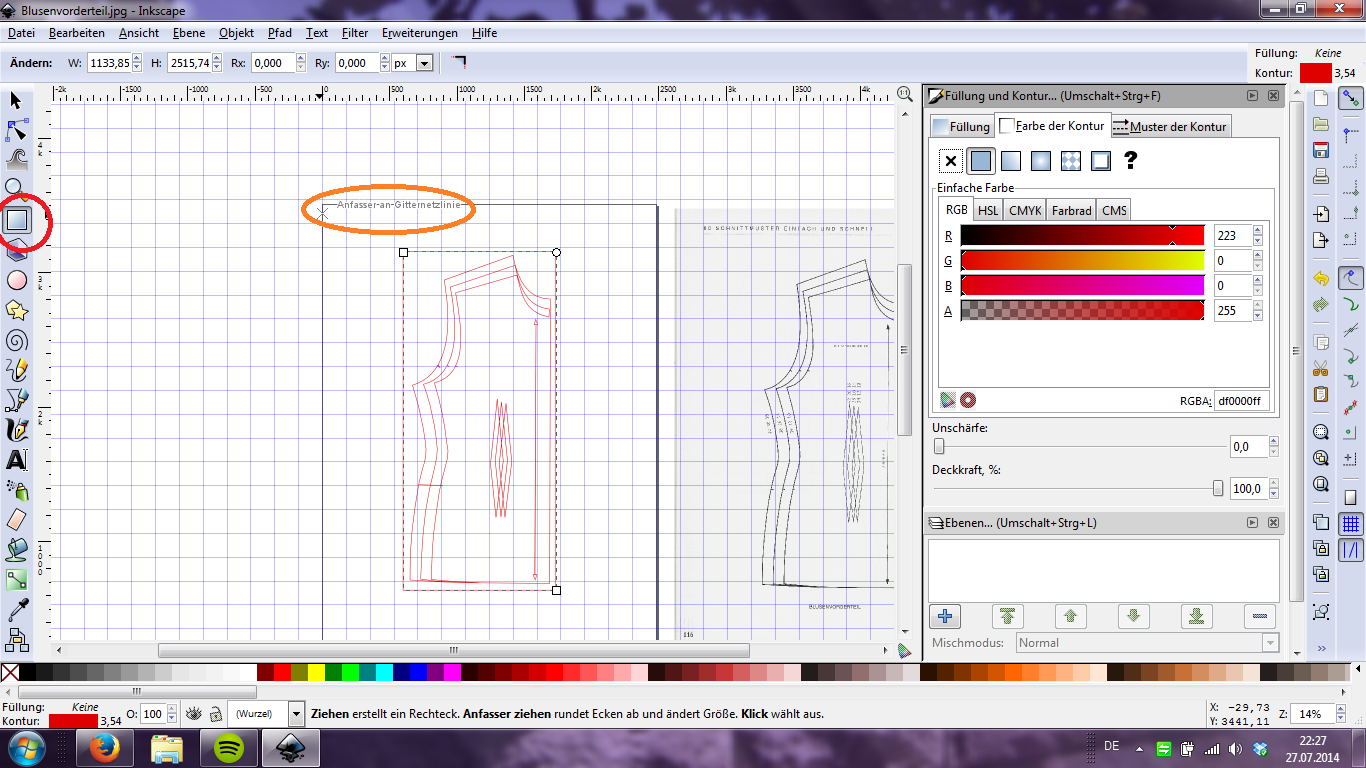
When I have the grid, I draw another rectangle around the entire pattern.
This means that the edges "stick" to the grid, which is very useful.
 Make sure you combine the rectangle with the other lines like you did before!
Now I count the squares within the rectangle, write them down and do a little math on them. This is where you need to know your ratio, my book says 1:4, but since my scanner for some reason saved the image at three times its original size, I had to divide by three and then multiply by four.
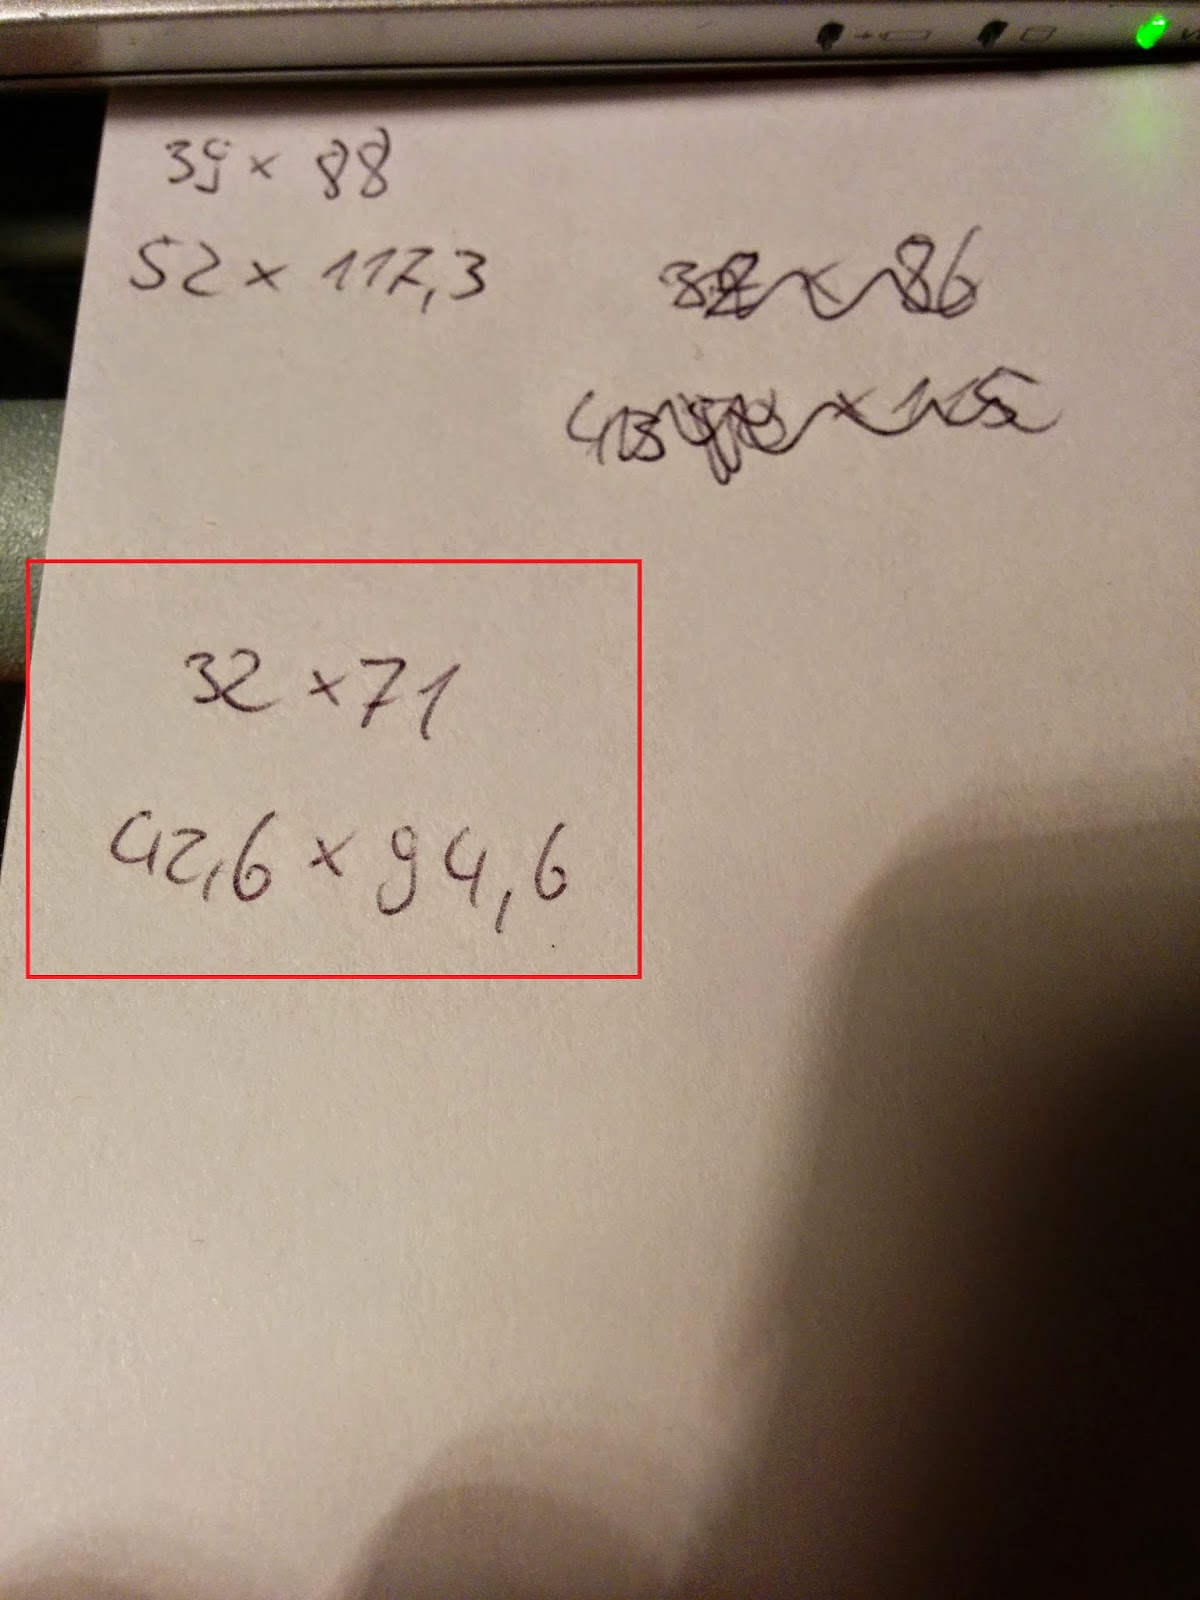
What, you didn't think that
this was gonna be entirely
digital, did you?
Using the same window where you found the grid settings before, you can now change the page size to your new measurements.
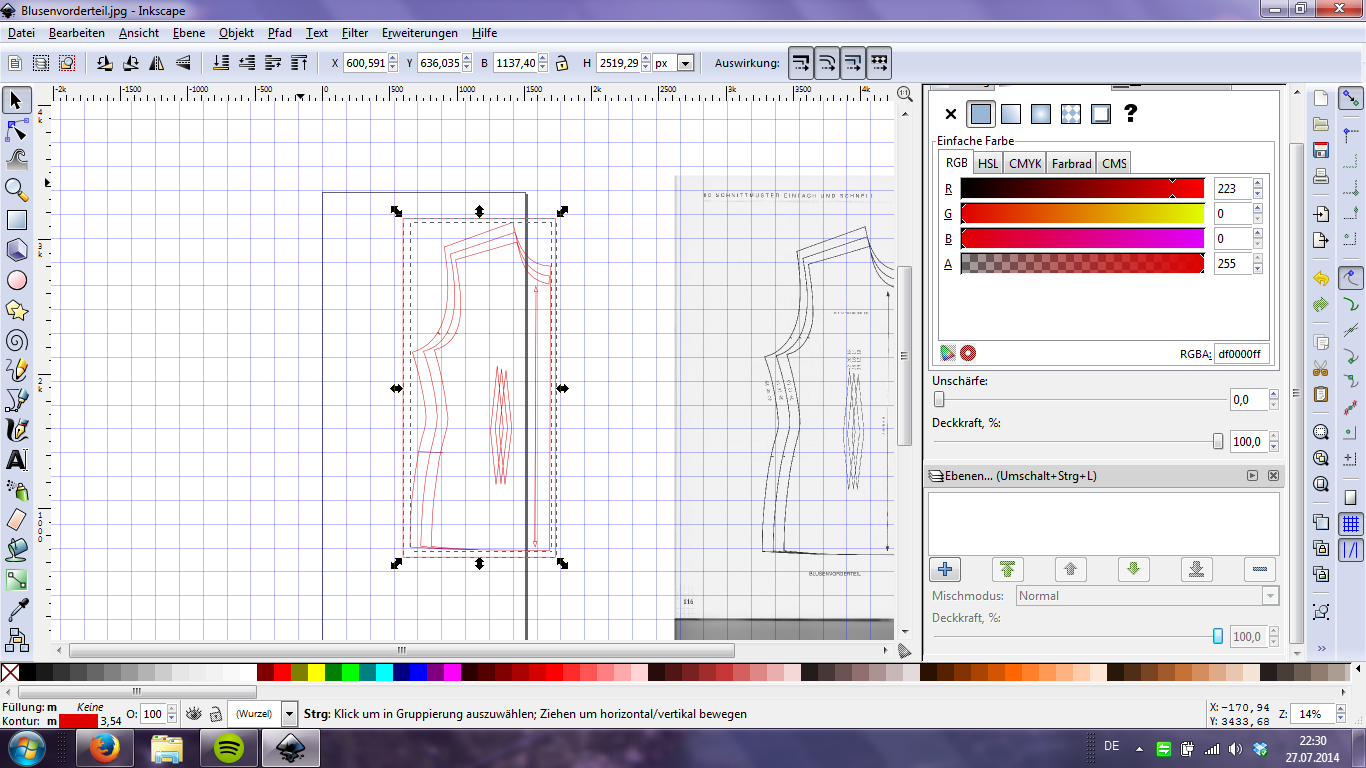
If it looks like this, you're almost done!
Now we're actually enlarging the pattern:
Still with the selection tool, move it to one corner of the page
And, keeping Ctrl pressed, pull on one of the corners until you meet the
corner of the page.
It pays to zoom in at this point to get all the edges lined up. Remember to keep Crtl pressed when pulling on the corner, or the width to height ration distorts.
Okay, that's as far as we get using Inkscape. I suggest saving your work as an .svg file (the default option), so that you can come back and manipulate it further later on, if you need to. But if you actually want to print it out, I suggest saving as a .pdf file, using the "save as " button.
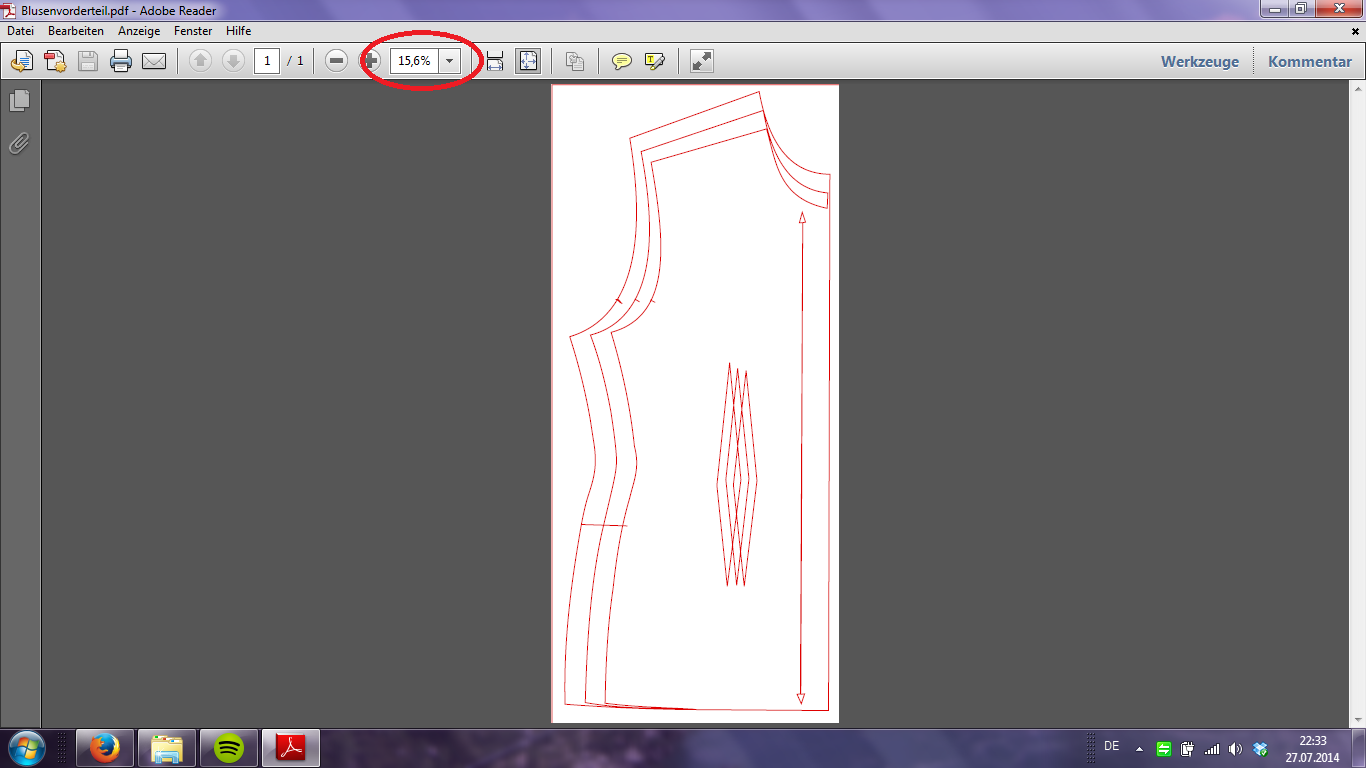
That's what my finished product looks like, note the zoom factor
 One last tip, because I didn't know this before: you can actually print this out at home, using the "poster" button in your print menu:
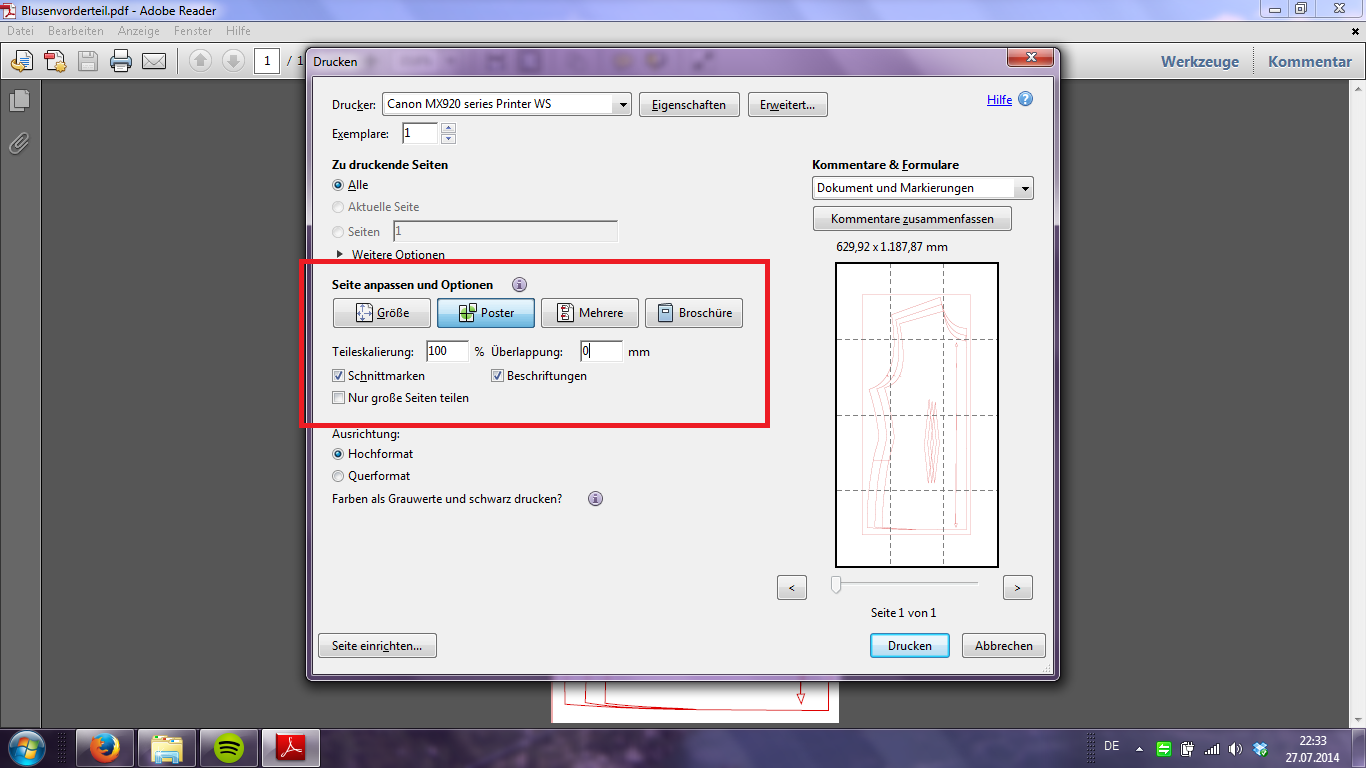
You might wanna select some overlap if you want to glue it together later
I hope that this helps some of you, if you have any questions, shoot, but keep in mind that I too am still learning to work with this program ;)
Right now I'm working on converting all the basic patterns from my mother's pattern book into printable patterns so that I don't lose any time enlarging next time I want to use one of them.

Montag, 14. Oktober 2013

Camping and cutlery

If I do something (especially for someone else) I try do do it right. So when my father asked me a couple of weeks ago to devise some kind of bag for our camping-cutlery, I knew two things: firstly, that this could be a very quick and easy project and secondly, that I'd make damn sure that it wasn't going to be too quick and easy.
That being said, me being a university-student first and hobby-seamstress only second, I had to get some studying and exam-writing out of my way before I could get to sewing, but at least that gave me plenty of time to plan the project and think and rethink what materials I wanted to use how. Since this bag is going to be used mostly in/with our camping van and I had tons of fabric left over from sewing the curtains, I wanted to use the green-checkered fabric in some way. I thought about using it as a simple lining, but then thought a sturdier fabric might be better suited to withstand knife- and forkpoints. After rummaging through my (and my mother's) stash, I found a blue sturdy fabric of a surprisingly narrow width - I'd say about 80cm. No clue what my mother used it for, as it was still in one piece when I foun it o.O
Anyway, I'd seen and read some tutorials about  piping and just love the way contrasting piping looks as a seamfinish, so the green-checkered cotton was going to be used as piping. On to the pictures!
Lots of biasstrips
Cutting biasstrips from checkered fabric is so easy that I got a bit carried away and cut a lot more than I actually needed. Which wouldn't be too bad if I also hadn't cut them so narrow that it's hard to use them for anything else than piping. Ah well, we live and learn :)
As I wanted my bag to be 50cm*50cm, I knew my piping had to be a little over 2m long. I sewed the three longest strips together, folded them in half and sewed in the cord using a zipper foot and moving the needle to the very left
Just keep piping, piping, piping...
(Stuck in my head right now.) I then sandwiched the green piping between the two blue layers (kinda tricky in the corners) and sewed around the square, using the zipperfoot and leaving a small opening so that I could turn the whole thing inside-out.
I think that's the first time I've sewn an entire
project with a zipper-foot... :)
After turning it inside-out and ironing it, I cut the piping ends to match, leaving a little fabric to be folded over to hide the raw edges. Then I sewed the opening closed by hand using a combination of a whip- and a running stitch (only catching the blue fabric going out, not going in)
The easy way would have been to fold the thing up and sew the compartments in the same blue thread I used for handsewing. But that would have looked so boring. (Plus I was too lazy to thread the sewing machine with the blue thread and wind a new spool. Funny how laziness so often leads to more work rather than less, don't you think?)
As I said, I had cut way too many bias strips for the piping, so I decided to cut four strips to length, fold the edges to the middle, fold the ends under and sew them onto the bag. Did I mention that the strips were a little too narrow to be comfortably folded and pressed? No? Well, I didn't burn my fingers, but by the time I was done bending over the ironing board I felt like Quasimodo. Anyway, as it was almost two in the morning, I didn't take any pictures of the process, but I think the result speaks for itself:

Much prettier than mere stitching.
The ties were made by sewing two of the strips together and turning inside out. All in all, it's a very simple project that everyone who's ever had a beginner's sewing course has done in variations (I know I have) but it still makes me happy that such a simple thing can be made so pretty. As I said before: if I'm gonna do it, I might as well do it right ;)

With the top folded down...
... and tied closed :)


Freitag, 16. August 2013

How to fix ripped jeans

I did promise a tutorial, didn't I? Sorry it took so long, my brother came home from spending one year in England on monday, I'm still working in that internship that just takes a lot of my time and I am actually writing this from my (more or less) broken laptop where the space-key gets stuck every 50th word or so and that I hooked up to a monitor since the laptop's monitor is broken.
In any case, before going out and buying three new pairs of pants (gotta love going shoppig with my mom) on friday, I had to fix the one pair I own that I didn't leave behind in my apartment when moving into my parent's for the summer.
I put my hand behind the hole to show you where it is
 I don't know where you usually rip your jeans (if you do so at all) but mine always rip between the legs, because I mostly use my bike to get around and that's where the friction is. On the one hand, it's a nice spot because you don't have to be too neat with your patchwork because nobody's gonna see it anyway, on the other hand it's a spot that's just a pain to reach with a sewing machine. But practice makes perfect, and after doing this for about 20 times I think I found a fairly effective way of dealing with holes in my jeans.

As you can see from the patches, I've fixed these before
Turn your pants inside out and look for the rips (two in my case). Cut out rectangles of fabric (some old jeans you can cut to pieces come in handy) that will cover the entire slit and the surrounding area.
Pin them on where you need them. This might take several tries, but be patient, it'll be much neater in the end if you don't rush this point.
Sew along the edges using a zig-zag-stitch for strength. Don't worry when you have to sew over old patches, a sewing machine can take more than two layers of denim without problems.
The patches from the inside...

You can stop at this point if you feel like it, if you used a matching coloured thread your patch will be pretty much invisible. But if the hole stems from friction, the upper threads will just wear away more until you're back to one layer (the patch) and have to worry about wearing that away as well, so unless the hole you're fixing is at your knee, there are a couple more steps to take. 
...and from the outside.


You can see where I fixed a previous hole because I didn't have any matching thread, but spotting the stitch lines from the other two patches is a little harder, don't you think?
Turn your pants right sides out, let's stabilize these b****es!
 Using a large zig-zag stitch or something like that (just make sure it covers a lot of space, I've done stabilizing using different embroidery patterns on my mother's sewing machine when I felt like it, but you can also just sew back and forth in a straight stitch if that works better for you, just as long as you do it perpendicularly to the slit) i sewed over the rip a couple of times, virtually fixing the threads to the patch with a lot of tiny stitches and thus stabilizing the whole thing.
 On the right are the finished patches as seen from the inside, so you can see the stabilizing stitches a little better. The patch in the middle has them as well, only done in a lighter coloured thread.

I've been fixing my jeans like that ever since I started sewing, and I'm proud to say that because of patches, I can still wear jeans I bought at the age of fifteen. And in case any of you were wondering: it doesn't chafe since we made the patches out of denim fabric. It helps saving money because you don't have to buy new pants everytime the old ones rip, and it saves me from having to throw away my favorite pair of jeans already. I hope you enjoyed this little tutorial and it helps you save either your favourite clothes or your wallet (or both) :)

Donnerstag, 18. Juli 2013

Minion in progress

I did promise some in-progress-pictures, didn't I? So, while granting myself a free afternoon filled with watching "The paradise", I got quite a lot of crocheting done:
Eyes and mouth pinned on, arms still missing
I ran out of yellow yarn, so I haven't done the arms yet, I'll probably get some on monday. Changes I've made to the pattern so far:
  • As I said, I ran out of yellow yarn, so the body is quite a lot shorter than it's supposed to be - I stopped at round 42 of 55 straight rows
  • With a shorter body, I also made the front- and backpanels of the overalls smaller (left out two lines) so as to have some room left for the face.
  • I couldn't get the boots to work with that strange 12 chainstiches beginning, so I started by chaining 5 stitches, two single crochets in the second loop from the hook, 1 sc in the two following, 4sc in the loop at the end of the chain - that should bring you to the other side - 1 sc in the two following and again 2sc in the last, that gives a nice-to-work-with oval shape of 12 stitches. I then doubled all the stitches (24) and then did one more round, doubling every second stich on the curves, you can do that pretty good by eyeballing. That gave me about 30 stitches. I followed the pattern again until it came to diminishing (declining? It's abbreviated with dec.) Adjusting the pattern I had (count your stitches, divide them by two, minus four) I did 11 sc; diminished 4times and did 11sc. next round 9sc, dec. 4times, 9sc. next round 7sc, dec 4times, 7dc follow the pattern again
  • I also crocheted the little black buttons (4sc on a loop, pull tight, knot off, leave two long strands to sew to your overall)
  • I made the goggles out of grey felt, because I had some lying around, instead of grey yarn, which I didn't. Still looks pretty cool, though, I think :)
Since I don't think I'll go into as much detail as the original pattern, all that's left to do are the goggle straps and the arms, into which I'll try to build in some wire-understructure as to make them bendable. Oh, the fun :)
 Lilly's birthday is early in september, and if I don't get bored with them until then, I'll give her this minion plus a purple, evil one from despicable me 2.  (I'll just buy two balls of purple yarn, then I can make it in the right size plus have some left over to do that craaazy hair - Oh, what fun :) )