Posts mit dem Label HSF werden angezeigt. Alle Posts anzeigen

Sonntag, 2. Februar 2014

HSF #2: Innovation

Guess I'm back to procrastinating. Huh, who would have thought. On the other hand, I did say I'd sew when I felt confident in passing, so let's say I rewarded myself with a little bit of sewing last weekend. A couple of years ago, when I first started reading up on victorian clothing, I learned that in order to get such prettily bell-shaped skirts, women wore crinolines underneath. Obviously, I had to have one. Since I've always been a bit on the thrifty side, and round cage-crinolines seemed a pretty straight-forward concept, I didn't bother with a pattern. Instead I drew and calculated, and because that was several years ago, I don't have the sketch anymore. Still, I did kind of the same thing The Laced Angel did here, only I spaced all four hoops evenly, because I'm neat like that (and didn't know any better). The math I did went something along the lines of "well, I want to be able to walk through a normal doorway without squeezing, so the bottom hoop can't have more than 80cm diametre, so the circumference would be...(looking up formula in the internet)... 2,5m." and went on from there. I think I only used four hoops because of the price of the hoop-steel, but I'm not sure. Anyway, I ordered hoop-steel online, marked it in neat 10cm sections, marked where I needed to cut only to realize I didn't have any tools to cut it. My brother eventually helped me out with a Dremel. (To my embarrassment I have to admit he meant to show me how to and then let me do it myself, but I was way too afraid to slip and cut off my thumb to do it properly, so he had to do most of the work...)
I cut (tore?) an old bedsheet to strips, folded and pinned and sewed and so on, with the final result looking like this:
Because I didn't know any better, it ended up being way too long, so when I put it on and tried to walk around, I always stepped on the lowest hoop. Also the closure was impractical, and I didn't really like the form - not bell shaped enough. The picture above is what it looked like even after I shortened the uppermost strips by 10cm, so you can imagine how unsatisfied I was with it. So I packed it away and there it was, waiting, biding its time.
I had sometimes thought about taking a rectangle tube of fabric, sewing on channels and thus making a more stable hoopskirt (and eliminating the danger of stepping through the bottom "window"), but until I read the blogpost linked above, I hadn't thought about it seriously. And even after that, the thought of making four 2,5m channels (folding and ironing!) and marking, placing and sewing them onto 2,5m of fabric 4 times (8 if you count having to fix both sides of the channel) always put me off. But then, as you might know, I got the Green Checkered Nightmare. My brother had ordered a bright green checkered cotton to sew curtains for our van out of, and sew I did. (folding and ironing, folding and ironing, occasionally I even pinned!) Not being accustomed to calculating with lengths, widths and whatever of either fabrics or cars, he ordered way too much and generously gave the leftovers to me (which also encourages thoughtful measuring and counting ;) ).
But bright green checks isn't my colour - at all. So what to do with all that free fabric? Why, tear off strips until you have 10m and use the checks as easy guidance for where to place them! Here we go:
I took a rectangle of 2,5x1m as a skirt base and put a channel every 25cm. I didn't bother with pinning of ironing, was a lot more relaxing that way ;)


So I sewed down the channel once, folded over, sewed it down once again, rinse, repeat.

I took the opportunity to use up all those leftover bobbins wound with colours I don't even have the spools of anymore.


After that I gathered the top and put it into a waistband (couldn't really do that without pinning, though)
Then I only had to feed the steel through...
...and done!
I put together a little comparison:
Much better!

Just the facts:
The Challenge: Innovation

The Innovation: Hoopskirt/Crinoline. As far as I know, hoops were worn by women of all classes, so this very small hoop could even be a working girl's skirt.

Fabric: bright green checkered Cotton

Pattern: Math and this 


Year: between 1856 and 1860

Notions: couple of metres of hoop steel 


How historically accurate is it? I have no idea if there were actual hooped SKIRTS, if there were, cage-crinolines were a lot more common. In any case, I like the silhuette and as that's the important thing about underwear, I'll give it a 50%

Hours to complete: ehm.. 3? 4? 5? something like that

First worn: not yet (as I have absolutely nothing to wear it with

Total cost: Once again, all from stash! yay


Montag, 30. Dezember 2013

HSF #26: Celebrate!

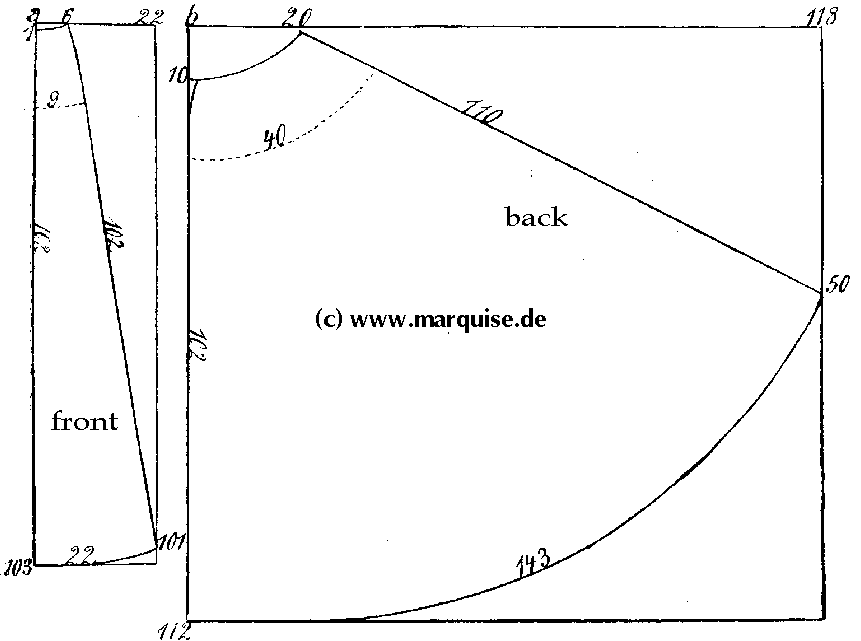
I'm going to a New Years Eve party tomorrow, and didn't have anything to wear. Wait, that's not right. I could have worn my prom/graduation dress (all in one ceremony here in Germany), but that's about knee length and a friend of mine wanted to wear her floor-length prom-dress without feeling overdressed. I had some lovely drapey/flowing black fabric given to my by my brother, who had used it to darken his home-theatre but took it down some time ago. I soon thought about making it into a ~1900 Skirt like The Dreamstress or Fashion through History, but didn't think I'd get it done before New Years, as I'm going snowboarding tomorrow and won't really have time to sew anything. But today at about 5pm I couldn't stop myself and started looking for patterns. From the diagram in Fashion through History's post I could tell that it didn't look too complicated, and amazingly googling "1900 skirt pattern" led me to this site. I looked at several of the patterns, my limited timeframe and my tons of free fabric and decided to make the 3 part skirt:

After measuring myself, I made it a little bit longer in the front by lengthening the center front line from 103 to 110 cm. To get even more flare in the back, I enlarged the rectangle from 118x112cm to 130x120cm. And confession time: While I drafted the front piece on a piece of paper and cut it out, I was too lazy to do so (and didn't have a large enough piece of paper without gluing stuff together) for the back piece and just drafted it right ontot the folded fabric. It worked like a charm (and lot quicker than the alternative, too!). 
Due to my rush, I didn't stop to take in progress pictures, but I think the construction is pretty straight forward. I did have to fiddle a bit to get the waist to fit, but those were minor changes. I finished the waist with a facing and did the hem with a rolled hem foot on my sewing machine - thank god for rolled hem foots! (feet...?) I sewed on two snap closures by hand and bam - finished skirt (as long as nobody looks too closely at the inside ;) ). 
I did a quick fotoshoot, but since the party is tomorrow, I'll probably get some better pictures by then. For now, you get this:
I just love how much fabric is in the train, I can easily pull it up and pin/tuck it to my waist for when we're going outside to shoot fireworks at midnight :)
And since this is literally an item made for a celebration, I guess it fit's the HSF challenge number 26: Celebrate!

The Challenge: Celebrate! (a ~1900 three part skirt for New Years Eve)

Fabric: Some synthetic my brother used for darkening purposes in his home cinema. After he took it down, he gave it to me, but he couldn't tell me what it was, just that it had been cheap

Pattern: http://www.marquise.de/en/1900/schnitte/s1900.shtml -> scroll down to the 3 part skirt

Year: it says 1908 somewhere on the website, but I didn't have time to find out if that year applied to my pattern as well. Somewhere around that time in any case

Notions: thread, two snaps -> stash

How historically accurate is it? Not at all. It's historically inspired, but sewn with techniques I'm pretty sure they didn't have in 1900 (rolled hem with a zig-zag-stitch, I think not :D) and the fabric is wrong.


Hours to complete: Two or three, including drafting the pattern. Wow, that went quick!

First worn: Today for some pictures, tomorrow for the party!

Total cost: It's all from stash, so FREE!

I will probably use this for a more historical costume some time, but for now I only have my modern clothes to combine with it. But even though the design of the skirt and the rest is more than a hundred years apart, I think they go pretty well together! 

(Because you made it so far ;) )


Montag, 16. Dezember 2013

HSF Challenge 25: One Metre

Argh, where did the time go? That's what happens when you always start two new projects while still working on the first... Anyways, while technically a day late, I finished my shift pretty close to on time despite my sewing ADD. Look here:
This is me without a dress form or a self-timer.
I didn't use a pattern but rather just cut out a couple of large rectangles for the body, smaller rectangles for the sleeves, two squares for the underarm gussets (I made them 15 * 15cm, that worked pretty well) and two triangles for the hip gores/godets/gussets - you know what I mean.
In my last post (about the shift) I showed you the sleeves and my beautifull flatfelled seams - turns out, if you flatfell your sleeves and forget to double-check which side is right and which is left, you end up putting in a sleeve inside out. Not sure if I'm gonna fix that, though, because as I said, you can hardly tell it's the wrong side, plus it would be a lot of work for a piece of underwear that's not even supposed to be seen. So the armholes are the only seams that aren't finished while everything else is flatfelled. I did the shoulder seams last (for no particular reason), so here's the only other time I stopped to take a picture:
Calculating, drawing and cutting the neckline. I bound it with bias-tape which doubles as a casing for the drawstring, which is some Dollarstore Polyester-ribbon I had lying around. All in all, I'm pretty pleased with my first entirely handsewn (!) garment:
Just the facts:
The Challenge: One Metre
Fabric: 1m of white cotton
Pattern: squares, rectangles and triangles
Year: 1800 +/- 10 years
Notions: white bias tape and white poly-ribbon from stash, white cotton thread also from stash
How historically accurate is it? Completely handsewn, but wrong fabric for the era (I think linen would be accurate) and the poly-ribbon... so let's say 50%. Then again, it's underwear, so as long as my hypothetical time-travelling self doesn't get undressed in public, I should be fine.
Hours to complete: at least 3 movies and 8-10 Futurama episodes, so that makes... about eight hours over two weeks
First worn: half an hour ago for the bad cell phone pictures
Total cost: I think it was about 5€ for the fabric, everything else was from stash.


Mittwoch, 2. Oktober 2013

Some more Regency

Let's start with the sleeves. I meant for them to be in last weeks photoshoot, but they didn't go with the dress, so I meant to take some pictures of the finished sleeves on me, which didn't happen either because I have a cold and couldn't be bothered. Sorry. So, instead, you're getting pictures from when I worked on them.
Working on the sleeves
You can see where I reduced by four
stitches at the ellbow
I knitted in rounds with yarn my mother bought a couple of years ago to make toques for my brothers, no idea why she bought so much of it.


Anyway, just the facts, ma'am:

The Challenge: #20, outerwear

Fabric: 2 balls of white yarn, I think it says polyacryl, but it feels nice and seems to be pretty warm

Pattern: none, just counting. Knitted in continuous rows

Year:  ~1800

Notions: thinking about weaving some coloured ribbon through at both ends to tie some pretty bows, the colour would depend on the dress though, so I haven't put any in yet.

How historically accurate is it? Uh... although knitted sleeves did exist, they would have been done in much finer yarn with much smaller needles. Maybe as a gift by a little girl learning to knit to her older sister?

Hours to complete: Done while watching TV or DVD's, so maybe 3-4 hours per sleeve? I really should start counting these...

First worn: not yet

Total cost: Free :D

And actually on me! The top
And the bottom


Sonntag, 22. September 2013

I almost forgot...

that I had some pictures to show you! I finished the green corset. And while working on it, I figured that I had finally something to enter into the Historical Sew Fortnightly! (For those of you who don't know what that is, click on that link, read that post and every other post in her blog that has to do with the hsf - it's just amazing!)
I've been ogling all those fantastic creations forever without ever having something to enter myself, but here I go.
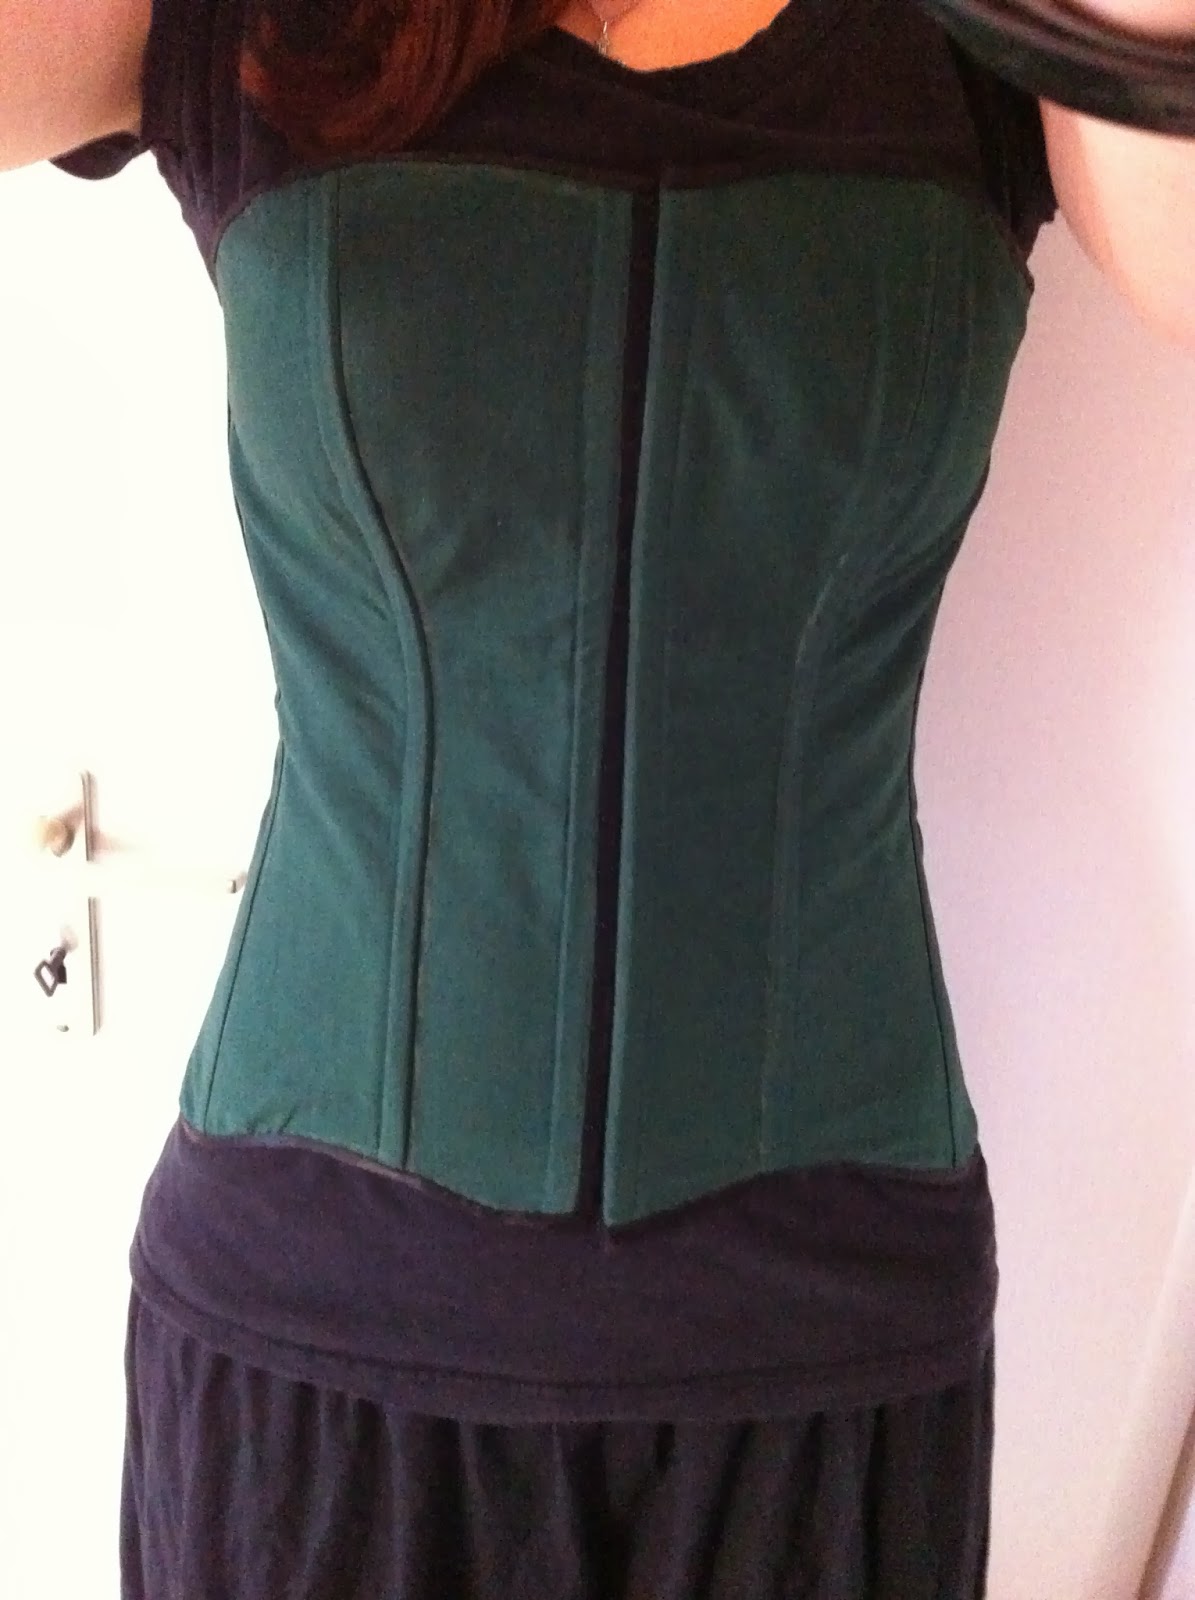
No shift, no self-timer (took this on my
phone because I couldn't find my camera)
and waay too little hip
The Challenge: #19: Wood, Metal and Bone

Fabric: Green Cotton and and some unaccountable, probably synthetic, but very sturdy lining fabric from Ikea

Pattern: This.

Year: The pattern says late 1870's...?

Notions: Hooks-and-eyes-tape, satin(?) ribbon, zip ties for the boning

How historically accurate is it? uhm... it is called a corset and corsets were worn in that era, but other than that not at all. I could overlook all the wrong materials if it would at least give me the proper support and silhouette it's supposed to, but it doesn't. Well, better luck next time :)

Hours to complete: never timed it, so no clue.

First worn: for the pictures

Total cost: maybe 10-15€ for the zip ties and the hooks-and-eyes-tape, everything else was from stash. Yay, at least it's a cheap failure ;)

Oh - and it's currently laced with bright blue and green shoelaces because I didn't have anything else, but I don't know under which point to file that info ;)
At least it looks nice from behind :)

I have an idea of ripping up the side seams up to the waist and putting in some hip gussets for some more curving (and to have somewhere for that squish to go, as the Laced Angel puts it).
Does anyone have any ideas if that will work at all? Or should I just go with making a new, improved version all together? After all, this was only supposed to be a trial run?